Adding a new user account in WordPress is quite easy.
You may want to add a colleague to help you out, or create an account for your developer to have access.
This is how you do it.
1. Log in to your WordPress Admin Area#
You do this by adding /wp-admin to the end of your website address.
Example:
Northrook.com would be northrook.com/wp-admin or northrook.com/login
Some sites may mask or hide the /wp-admin or /login pages for improved security.
If this is the case, please contact your developer.
In doubt? Contact us.
2. Click "Users" in the Admin menu#
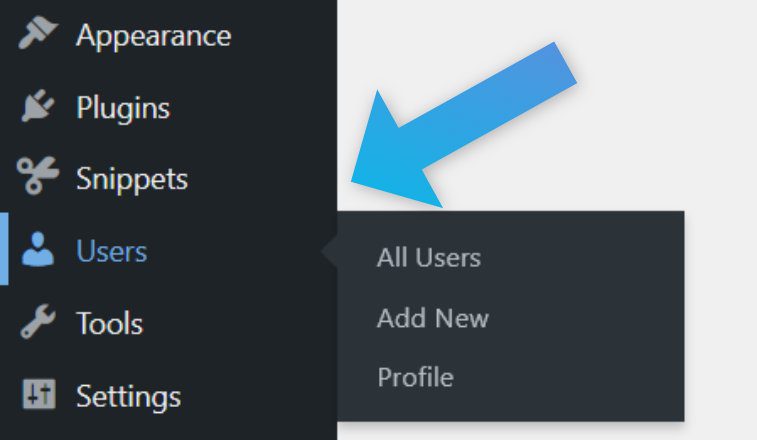
It will by default take you to the Users overview, where you can see all the current users, their names, e-mail address and roles.
3. Click "Add New"#
You can find this button at the top of the page, next to "Users", and in the Admin menu when viewing any User information.
4. Fill out the information#
You only really need two bits of information: a username and an e-mail.
It is important to note that usernames cannot be changed. You can always change names, nicknames, e-mail addresses and so forth, but the username serves as the anchor point for WordPress, and cannot be changed.
- Username (required)
This will be what the user signs in with.
Keep it nice and simple, something like the users first name. As long as the user has a decent password, you don't need to obfuscate the user name. - Email (required)
The users e-mail address. WordPress will be able to send password reset requests and other information to this address. - First and Last Names
These are self explanatory, but can really be anything you'd like. The user can select how their name will be displayed publicly (Name, Firstname Lastname, Nickname, etc). - Website
This will be used when author profiles are viewed, or if the website otherwise looks up the users website. - Language
The language used when this user logs in. WordPress with automatically download the selected language for the user. This does not affect the front-end language by regular viewers, and does by default not translate any front-end for the logged in user. - Password
You don't need to be too worried about the password here.
As long as you keep the next checkbox checked, the user will generate their own password. - Send User Notification
If this checkbox is checked, the new user will receive an e-mail letting them know a user has been created, along with a link to log in and create a password for themselves.
If this checkbox is unchecked, no e-mail will be sent, and the account will use the password entered or generated above. - Role
The level of permissions that the user have. This is a whole topic on its own, but broadly speaking:- Subscribers can only read the content of the website.
- Contributors can edit and delete draft Posts, but not publish them, they cannot upload files.
- Authors can Publish, Edit and Delete published Posts, and upload files.
- Editors are like Authors, but can also Publish, Edit and Delete Pages, including other users Posts and Pages. They also have access to private Pages and can edit categories and manage comments.
- Administrators have full rights. Only assign the Administrator role to users you trust completely.
This includes deleting other user accounts.
5. Click the "Add New User" button#
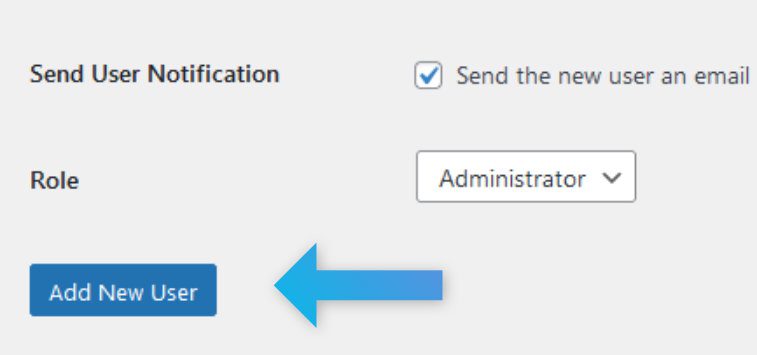
WordPress creates the user, assigns roles and if chosen, sends an e-mail. This all happens in seconds.
You don't need to send the user the generated password, as they'll be generating their own.
The new user is now ready!
Forgotten passwords? No problem#
Right on the login page, you can click "Lost your password?" and have WordPress send the user a reset password e-mail. Easy!